

Homemade apple pie has a reputation—it's comfort food, a holiday staple, and a bakery window showpiece. But getting that flaky crust and rich, balanced filling at home? Not always easy. It can go soggy, too sweet, or just flat. Still, when it works, it really works. Warm slices, crisp edges, soft apples, and a buttery smell fill the kitchen. That’s the goal. Not perfection, just something honest and good. This guide keeps things simple, slightly rough, and very doable. No fancy tricks, just solid steps and a few smart choices. In this blog, we'll learn about the best homemade apple pie recipe.
A proper homemade apple pie recipe doesn’t need drama. Just good apples, decent dough, and attention at the right moments. Skip shortcuts if you can—but also don’t overthink it.
Just a short list—basic ingredients, nothing fancy, but each one quietly does its job.
For the Pie Crust:
For the Apple Filling:
Simple list. But each part matters.
That’s it. No shortcuts, but no stress either.
Also read: Simple Ways To Bake Flaky Puff Pastry Cinnamon Rolls Now
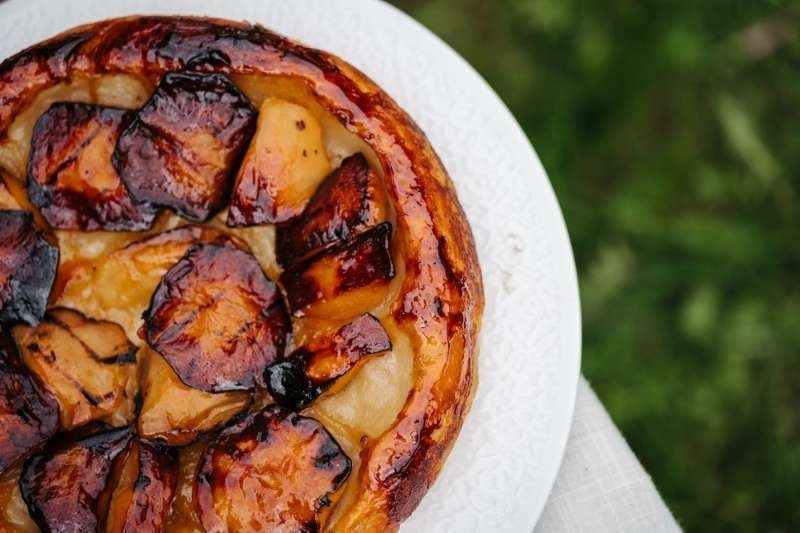
Classic apple pie isn’t about complexity. It’s a balance. Sweet, tart, soft, crisp—all together but not perfectly blended. Some people over-sweeten. Mistake. Apples should still taste like apples.
Use a mix. Always.
Avoid only soft apples. They collapse—filling turns mushy.
Crust is where most fail. It’s tricky. Not hard—just unforgiving. Small mistakes show up fast; there's no hiding them later.
Apple pie is one version. But apples can do more. A lot more. Sometimes pie feels too heavy. Try alternatives.
Each has its own rhythm. Pie is slow. Others are quicker.
Add extras—but lightly.
Not all at once. Choose one or two. Keep focus.
Serve warm. Always.
Cold pie? flat experience.
Suggested Reading: Make the Best Mini Fruit Tarts Recipe for Your Next Party
Comfort food, but also a bit unforgiving if rushed. Baking an apple pie is less about the recipe, more about timing and heat. Small mistakes show up quickly.
Start hot. Then reduce. Why? Initial heat sets the crust fast. Prevents a soggy bottom. Then, slower baking cooks fill evenly. Keep an eye on timing, though, because too much early heat can over-harden the outer crust before the inside structure stabilizes, which throws off the final texture completely.
Edges brown faster. Shield with foil if needed. The center should bubble—that’s your sign filling is ready. No bubbling? not done. Also, rotate the dish midway if your oven has hot spots, since uneven heat can brown one side too quickly while leaving the other undercooked, which is easy to miss until it’s too late.
Traditional pie recipes weren’t precise. No measuring cups. Just feel. That’s worth remembering. They leaned on instinct, passed down quietly, and adjusted without thinking.
Old methods were rough:
Yet results were often better in spirit. Not perfect, but real.
Modern recipes often overload sugar. Traditional ones didn’t. Fruit carried the flavor. Try reducing sugar slightly—you’ll notice. Start small—cut a spoon or two and let natural sweetness come through; the taste shifts slowly but feels cleaner, less heavy, and closer to what it should’ve been.
Don't Miss: 10 Quick & Easy No-Bake Pies Recipes That Anyone Can Make
Homemade apple pie isn’t about getting everything right. It’s about getting enough right. The crust might crack, the filling might bubble over, and edges may brown unevenly. Still good. It's actually better that way sometimes. There’s something in the roughness—feels more real, less staged. Follow the basics, adjust as you go, and trust your instinct more than exact measurements. And don’t chase perfection; it kills the joy. Make it once, then again, then slightly differently. That’s how it improves. In the end, it’s just flour, butter, apples—plus a bit of patience.
Usually, there is too much juice from apples or not enough thickener. Let the filling sit before baking, plus add a bit of flour or cornstarch to it. Also, cooling time matters—cutting too soon makes it seem watery.
Yes, but texture changes. Skins can feel slightly tough after baking. If apples are thin-skinned, it’s fine. Otherwise, peeling gives a smoother filling. It also helps spices coat evenly.
Keep it at room temperature for one day. After that, refrigerate. Cover loosely. Reheat slices in the oven—not microwave—for better texture. This keeps the crust crisp and the filling stable.
Yes. Freeze before or after baking. Wrap tightly. Bake the frozen pie longer at a lower temperature. Texture holds up surprisingly well. Thaw slightly before baking for more even heat.
This content was created by AI